Are you aspiring to do yoga exercises? Do you know where to start? You have come to the right place because we are going to take you step by step on how to get started with various types to get you going. Read on!
This article looks at the various types of yoga poses which can be accessed in studios and gyms as well as a four-week step-by-step tutorial to assist those who want to practice yoga in their own space.
What is Yoga
There is so much to Yoga than just acrobatic skill or flexibility. Yoga is an ancient practice originating from the Sanskrit language of ancient India which has a Hindu religion practice and rituals.
Moreover, the word Yoga has three interpretations which depicts what this exercise is really about;
- union,
- concentration
- and control.
These three go harmoniously to ensure that you get the best results in Yoga. More importantly, if one of these are not done well, the individual cannot fully do Yoga effectively.
1. Union
The ordinary separate self is united with the true nature of every person at the deepest level of their consciousness. People tend to desire to have a deeper union with either other people, their pets, or even nature. Most people have used these unions because they get the higher state of union with the divine cultivation.
Moreover, Yoga can actually unionize an individual to ensure they are whole with themselves, their body, mind, and spirit respectively. Hence the Yoga postures and breathing practices that encourage wholeness and oneness with yourself.
2. Concentration
Concentration is referred to as Samadhi and this is connected to Yoga intrinsically where you as an individual allow yourself to be totally absorbed in the present moment. This can be cultivated by ensuring that you practice it more and it can be translated into your various daily activities;
- sitting in traffic
- cooking dinner
- queueing for any service
- engaging with people
3. Control
There must be a control over your mind and body to ensure the union that is much needed in Yoga exercise.
Breathing for Beginners
The mind and the body is bridged together through breathing which is the key to controlling the mind and the body to ensure they are both in harmony. The breathing should be slow and relaxed to foster a quiet mind and deep meditation.
Moreover, anxiety and tension are the enemies of Yoga, and these can be prevented by having controlled full breaths to provide the body with energy as well.
Breathing is the essence of Yoga exercise or else people simply do physical fitness exercises which is way short of the whole Yoga practice and philosophies. As a result, yoga exercises must form the foundation of your exercise routine.
The patterns of optimal respiration are established through simple breathing exercising while you are in your seated position. Once these breathing exercises are done well, then you could change and vary your postures from easy to complicated postures.
There are three different types of breathing to look at;
- Thoracic Breathing
- Abdominal Breathing
- Friendly Breathing
1. Thoracic Breathing
Thoracic breathing involves inhaling slowly, gently and deeply through your whole trunk. More importantly, this deep breath should only be done for as long as it is comfortable to prevent over-doing it.
Thoracic breathing stretches and strengthen the intercostal muscles of the ribcage and thus your breathing capacity is improved and increased by regular exercise of this kind.
The technique of thoracic breathing;
- When you inhale, stretch out your ribcage while expanding through your chest.
- A sense of expansion in the back of the body should be felt as your ribcage expands.
- You could try to get a better sense of this expansion by placing a hand on the upper back.
- Then you must slowly exhale with control ensuring the exhalation length matches the inhalation length.
- Exhalation should make the ribcage contract and settle back towards the spine.
2. Abdominal Breathing
The diaphragm is drawn down into the abdominal cavity by moving our belly in and out as we breathe in abdominal breathing. Moreover, oxygen is drawn deep into the lower parts of our lungs through this breathing exercise.
Due to the effects of gravity, blood tends to pool and as such abdominal breathing is a more efficient form of breathing that will sure relax the nervous system.
The technique of abdominal breathing;
- When you inhale, stretch out your ribcage while expanding through your chest.
- A sense of expansion in the belly and the sides of your abdomen.
- Do not allow your ribcage to expand on this type of breathing.
- When exhaling, the belly must be drawn in towards the spine with control.
- Ensure the exhalation length matches the inhalation length correspondingly.
3. Friendly Breathing
This is the combination of both Thoracic Breathing and Abdominal Breathing also called the full yogic breath that enables longer and deeper breaths as much as possible.
The technique of Friendly breathing;
- The abdomen and the chest are expanded at the same time while you inhale
- The expansion should be felt through the front and back of the body.
- When exhaling, the chest will contract and the belly will move in towards the spine at the same time.
It may be helpful initially to place one hand on the chest and one hand on the belly in order to get a sense of this expansion and contraction and to ensure that is equal through the upper and lower half of the trunk.
Benefits of doing Yoga Exercises
Researches have shown that yoga practices offer you more benefits than just fitness. (source)
- Stress reduction
- Increased muscle tone and strength
- Improved flexibility
- Energy level that are increased
- Breathing is improved
- Weight management
- Stabilize your metabolism
- Improved circulation
- Protection from injury as exercises are not vigorous
The 9 Types of Yoga
These are the basic and common yoga types that can be done in yoga studios, because there is no better way to master yoga than to jump in with both feet and start doing it. And just like any new hobby, consistency will determine improvement and mastering the sport. All you need is time to learn and to study yoga.
These are all types of yoga that every beginner should know about. Remember! The best yoga class for you is the one that respect your principles and goals;
Hatha Yoga
This is a classical yoga which incorporates a lot of styles. In Sanskrit, Hatha means forceful or willful yoga because it has calming factors through meditation leading to deeper spiritual connection.
The classes of Hatha yoga are generally slow, lighter and gentle and ideal for beginners with poses that are held for longer minutes.
Ashtanga Yoga
Ashtanga classes consist of one or more yoga poses nonstop which encourage breathing between poses. This is a somewhat vigorous type of yoga that is both fast-paced and physically challenging. Thus, beginners are not encouraged to do this until they master the simpler poses.
Vinyasa Yoga
The yoga that use vigorous movement styles which are synchronized with breathing on a rapid flow through sun salutations. The classes combine numerous yoga poses in one flow.
Power Yoga
Although Power yoga is vigorous like vinyasa and ashtanga yoga, it is not structured with many poses in a nonstop manner. Instructors are allowed to teach what they want without following a rigid structure.
As a result, this type of yoga has gained its popularity in recent years worldwide because of its fluidity that allows instructors to spice things up a bit, and vary poses to suit the need of participants.
Bikram Yoga
Bikram yoga maintain consistency no matter where one attend. The typical Bikram class must;
- last for 90 minutes,
- with 26 postures
- coupled with 2 breathing exercises
- following a certain structure and order
- in a heated room with the same humidity of about 105°F (40.6°C).
moreover, this type of yoga is effective for flushing toxins and weight management as it encourages sweating and thus challenging your physical and mental health.
Jivamukti Yoga
These consist of weekly themes which incorporates chanting, meditation, readings and affirmations with warm-up sequence that are standardized.
Iyengar Yoga
This consists of longer poses than in other poses. As such this type of Yoga is excellent for the alignment of your musculoskeletal structure.
Moreover; belts, blocks, bolsters, chairs and blankets are props that are used in this type of yoga to prevent injuries, structural imbalances as well as preventing tightness. These props are said to be effective in teaching students or participants how to move into the posture properly.
Anusara Yoga
The anusara yoga include attitude, alignment and action categories which encourages students to flow with grace as they follow their heart.
Kundalini Yoga
In Kundalini yoga repeated movements or exercises integrated, and this style brings about dynamic breathing techniques, chanting, meditation and mantras altogether.
Kundalini is known to awaken the energy at the base of the spine and due to its focus on repetitive and improved respiratory capacity through the body. Moreover, this style has been shown to have many health benefits; (source)
- managing the obsessive
- compulsive disorder,
- obsessions or phobias,
- bad habits that turn into addiction,
- major disorders leading to depression,
- dyslexia,
- grief,
- insomnia, and other sleep disorders.
There are many yoga postures that are offered in various classes. What is important is for you as a participant to know what kind of classes you want to affiliate under. It is safe to always enquire what classes entail before signing up.
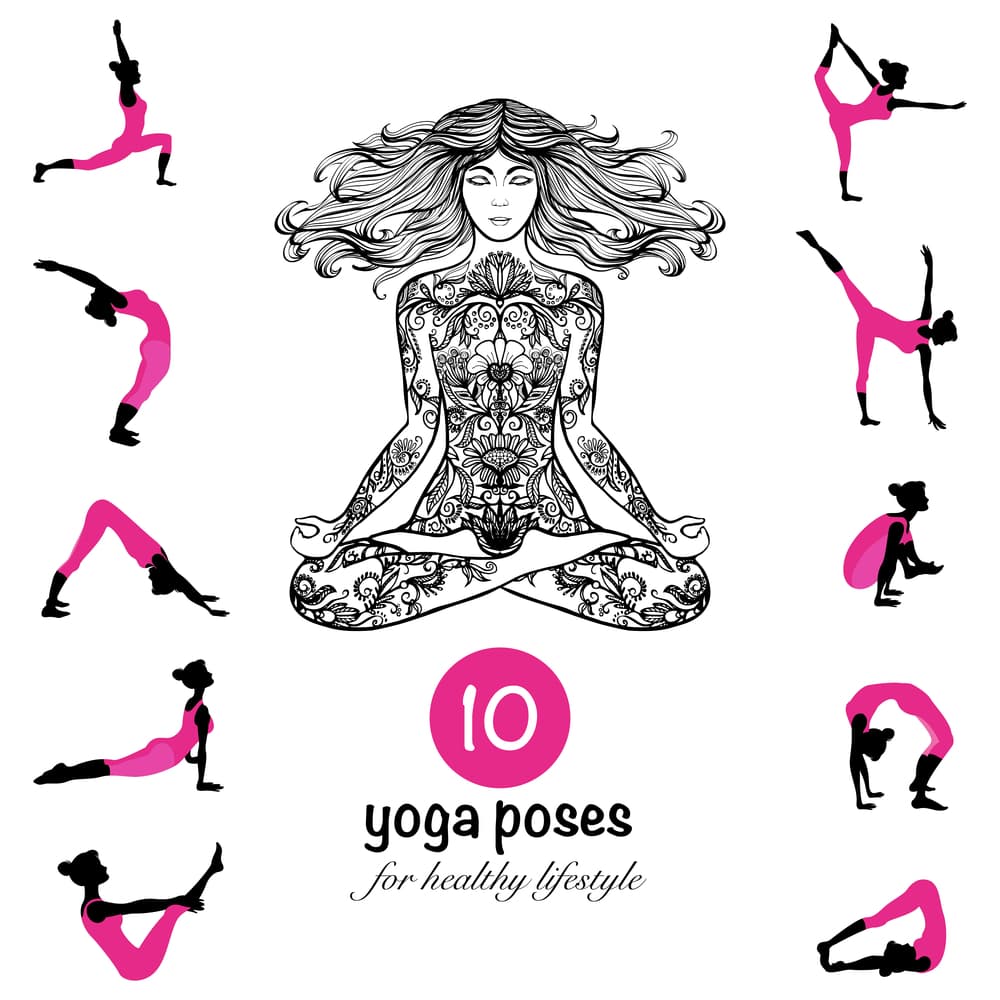
Yoga Poses for Beginners
These are simple and definitive guide to beginners aspiring to do yoga exercises in their own space, usually alone. For a beginner, doing Yoga postures is a completely different exercise one that need to be introduced little by little, week by week as you integrate more complex postures gradually.
The goal is to learn basic movements first, one at a time. Then you can link the movements together. Moreover, we have designed a 1 month programme that combines various poses from basic to complex poses which are introduced week-by-week to kick-start your routine. Remember, these are not cast on stone, and can be modified to suit your individual goals and needs anytime;
First week: Stretches for Warm-Up
Before you start these poses, you need to start with the breathing routine that we discussed earlier. Also these stretches form the foundation of all the yoga postures that you will eventually build up to.
Seated Neck Stretches
The basic neck stretches.
First one;
- inhale as you slowly lift your chin allowing your front neck be stretched.
- As you exhale, let your chin be lowered and also allow the back of your neck to be stretched.
- This stretch must be repeated at least five times.
Second one;
- Let the head be lowered to the left side as you exhale
- Let the right side of your neck be stretched
- And then return to the center, while you inhale.
- Let you head be lowered to the right side and exhale.
- And then let the left side of the neck be stretched.
- This stretch must be repeated at least five times.
Third one;
- A complete rotation of the neck must be performed
- Lower the chin as you exhale.
- Lift the chin as you inhale.
- The neck complete rotation must be done in both clockwise and counter-clockwise direction
- Each side rotation must be repeated at least three times.
Make sure to ONLY move within your range of motion and avoid over-stretching the neck.
Seated Shoulder Stretches
First one;
- Let the fingertips of both hands be placed on your shoulders. As you keep the elbow joints closed.
- The elbows must be lifted up and in as you inhale.
- When you exhale let the elbows be brought apart and down.
- The entire range of motion of the shoulder joint must be rotated.
- This routine must be repeated three times rotating in the opposite direction.
Second one;
- the right elbow must be lifted towards the ceiling.
- the right hand must be placed behind the head, reaching down towards the upper back.
- The right elbow must be gently pulled to the left using your free hand as comfortable as possible.
- This stretch must be held for five breaths
- The same routine must be done on the other side.
- This routine can be repeated 6 times alternating sides.
Seated Spinal Warm-up
First one;
- Let your chest be lifted as you begin to comfortably walk the hands forward as far as you possibly can. In your seated position.
- The back must be kept as straight as possible.
- This position must be held for five breaths.
- And then, the hands must be pushed in and the tailbone tucked in,
- Let the lower back be stretched
- another five breaths must be held in this position and walk the hands back in.
second one;
- walk the hands out to the left side as you fold forward.
- right side of the back is stretched
- this position must be held for three breaths
- and then do the same using the other side.
Third one;
- the right hand placed on the left knee while the left hand is placed on the floor behind you, be careful to keep the spine straight.
- Breathe in, gently twist to the left while exhaling.
- This position is to be held for three breaths and then breathe in again while you return to center.
- the same routine must be done, alternating sides.
Standing Hip Warm-up
- more than hip-width apart, stand with the feet.
- the arms must be reached out to the side as you breathe in.
- start to tip over to the right side as you breathe out, the right hand must be reached towards the right shin, and the left side of the body shall be stretched also.
- Breathe in and return to the starting position
- The routine must be repeated on the other side.
- This stretch must be repeated three times.
Third one;
2. Start with the feet hip-width apart. Perform gentle hip rotations, making a big circle with the hips. Repeat 3 times in each direction. Take the feet a bit wider and repeat three more times in each direction.
Second Week: Basic Yoga Poses
After one week of practicing to stretch in various position, you are now read for some basic yoga postures. All these postures are tabletop positions;
Cat/Cow Tilts
This position is done while maintaining the tabletop position.
- Keep your knees directly underneath the hips and the hands under the shoulders.
- While you breathe in, your tailbone must be tipped up and back.
- Let the belly be lowered towards the floor
- Let the chest be lifted and let your gaze be raised slightly.
- While you breathe out, let the tailbone be tucked under and round the back.
- Be careful to keep your shoulder blades spread as you keep the head relaxed towards the floor.
- This movement must be repeated five times.
Downward Facing Dog
You need to be on the tabletop position;
- Let the toes be tucked under and the hips lifted up and back.
- the hands must be pressed into the floor,
- let your spine be extended as you let the heels move in the direction of the floor.
- Let each of your knees bend in turn while little walking motions are made with your legs.
- The straightening of your legs is to be started after you feel limber. And the heels must be pressed towards the floor.
- bending the knees slightly and drawing the chest towards the floor will enhance more stretch into the back.
Extended Child’s Pose
Still in your tabletop position.
- Keep your knees more than hip-width apart position, and let the tailbone go under the heels.
- your arms must reach forward, as you get your hands placed on the floor, face your palms down.
- Take a deep breath into your back, make sure you’re your trunk is stretched with every breath.
- This position must be held for five to ten long breaths.
Plank Position
while maintaining the tabletop position;
- Let your two feet be stepped back so as to make the body straight from head to foot completely.
- with both your hands, press strongly into the floor.
- the shoulder blades must be spread wide.
- the stomach must be kept firm as you keep breathing.
- While doing this pose, please give it five breaths per round.
Knee-to-Elbow
while maintaining the tabletop position;
- Be in a plank position as you breathe in.
- bring the right knee to the right elbow as you round the back
- return to the plank position while you breathe in.
- repeat the same routine using the left side.
- The whole routine can be repeated three times alternating side.
Third Week: Basic Yoga Poses cont’d
This week we will do spine and hips poses in a more complex way varying it with gentle backbends and twists;
Cobra Pose
- Lie down on your stomach.
- As you breathe in, let your body be pressed into the floor along with your ribcage.
- Let your chest be lifted up and forward, while the hips are kept on the floor.
- Get your back lowered down as you breathe out.
- this movement can be repeated a few more times, be careful to ensure your back is arching a little bit more each time.
- the pose can be held for three breaths on the final time while you lower yourself when you breathe out.
Three-legged Dog
This pose is done while you are on a downward facing dog position
- the right foot must be lifted up and back while you breathe in.
- your right hamstring must be engaged while reaching towards the back of the room.
- your hips must be kept square to the front of the room
- hold for three breaths and then let the right knee be bent
- let the hips be opened up to the right side.
- Let the front of the right hip stretched through.
- This pose must be held for three breaths.
- And then you should breathe out as you return to the downward facing dog.
- Alternate the pose for the other side.
Thread-the-needle Pose
This posture is done in while you lie on your back;
- Let the left knee be bent while the left foot is placed on the floor and heels drawn towards the left sitting bone.
- the right heel must be placed across the left thigh. The knee must fall out to the side.
- Try to reach out to the left thigh with both hands as comfortable as possible. And then let the left knee be drawn towards the body.
- the head and shoulders must be kept in contact with the floor
- taking deep breaths five to ten breaths and then repeat the routine alternating side.
Supine Twist
This one is done while lying down on your back.
- Get your knees bent as the feet are placed on the floor. The heels are drawn towards the sitting bones.
- Your arms must be reached out to the sides.
- the hips must be picked up
- the hips must be moved slightly to the left allowing your knees to fall over to the right side.
- And then, settle toward the floor, gently.
- The position must be held for five to ten breathes
- Alternate side as you repeat the routine.
Fourth Week: Simple Standing Poses
We have compiled some of the simple standing poses which are good for strength building in the legs. More importantly, these poses can be linked together into one workout.
Warrior Two
Linking this with the downward facing dog;
- the right foot must step forward between the hands while the left heel is lowered to the floor,
- make your foot turn 90 degrees out.
- And then into a long lunge, you can stand up
- the chest must be squared towards the side of the room and the arms reaching out to opposite ends of the room.
- This position must be held for three to five breaths.
- Breathe out while placing the hands on the floor
- and then resume to your downward facing dog.
- Alternate side as you repeat the pose.
Triangle Pose
This pose is linked to the warrior two poste;
- the front leg must be straightened. Carefully bend your knee slightly.
- While you breathe out, the body must be tipped to the right. Allow your right hand to reach towards the shin while the left hand is pointing towards the ceiling.
- the back must be straight, while opening the chest towards the side of the room.
- Take five breaths and then go back to your warrior two pose as you breathe in.
- This position can be repeated as you continue to alternate sides.
Side-Angle Pose
This pose also is started from the warrior two pose;
- As you breathing in, let your right forearm on the right thigh while the left arm is reaching up and forward,
- Let the left side of the body be stretched and allow your chest to open up towards the side of the room.
- Hold the pose for five breaths and then return to your initial pose (Warrior Two) as you breathe out.
- Repeat the pose alternating the sides.
Half-Moon Pose
For this pose, It’s best to have a yoga block. This pose in the Warrior Two pose;
- your right hand must be placed on a yoga block six to 12 inches in front of your right foot.
- the weight must be brought into your right foot.
- lift your back leg off the floor while you inhale, and all the weight must be brought into your right foot and right hand.
- Let your hips be opened and chest must be up to the side of the room.
- and then allow your back leg to be lifted as high as you possibly can lift it. lift your back leg as high as you can.
- This position must be held for three to five breaths before you return to Warrior Two pose and breathe out.
The basic Poses name
In yoga lingo Sanskrit generally used for pose, particularly in studios and gyms. You might need to familiarize yourself with some common yoga terminologies so you don’t feel left out in your classes.
Moreover, these poses are foundational for all classes regardless of the intensity or level of class you are enrolled in;
- child’s pose (balasana),
- the downward facing dog (adho mukha svanasana) pose
- the warrior poses,
- and sun salutations
Yoga equipment you need
Whether you decide to join the studio or practice at home, you will need a mat. This is for your safety as working on the naked floor can lead to bad falls and thus injuries. Moreover, some classes use props and other equipment to enhance yoga practice including; blocks, blankets, bolsters, belts, chairs, etc.
Moreover, you could modify your supplies if you don’t have the proper equipment like the belt or scarf for yoga strap or replace yoga blocks with sturdy hard-cover book or even throw pillows.
Yoga clothes you need
Every sport has their appropriate gear to ensure comfort and safety. Yoga is not any different. This sport requires a lot stretching and movements and as such wearing clothes that are comfortable is of vital importance.
Other clothing includes;
- Stretchy pants or shorts
- Close fitting tops that won’t fly-up over your head when you move
- No shoes allowed but sock are acceptable
The best place to start yoga ?
Yoga can be done in various types of environment and individual will choose what is most convenient for them. More importantly, each option has its pros and cons.
Gyms
| Pros | Cons |
| Most mega gyms offer yoga classes. Having a membership at a gym potentially give you access to yoga at no additional cost. Moreover, gyms ensure they get the best instructors as they know affiliations depend on it. | Using gyms mean you must commit to a schedule and time structure, and it lacks flexibility. Moreover, if you can’t go to a gym for a long time, you still need to pay because gyms work on a contractual basis. |
Yoga studios
| Pros | Cons |
| These are specialized studios that mainly focuses on yoga. The best thing with these ones is you can easily get classes on different time frames because yoga is the only thing taught there. Moreover, instructors only focus on yoga rather than having to earn other exercise types and as such students get the best out of each class | These are more expensive. The rigid structure are limiting to students as they only get to do yoga. |
At home
| Pros | Cons |
| Technology has made sure that people can do yoga at the comfort of their homes whenever they want to do it. These include; Online classes or DVDs and they are way cheaper than signing a contract with a gym or a studio. | Doing it alone without prior knowledge can be daunting as people are more likely to make mistakes without even realizing they are not doing yoga the right way. Moreover, the risks of injury are slightly higher as there is no instructor to educate and correct students. |
Frequently Asked Questions (FAQ)
How often should a beginner do yoga?
Those new to yoga should have two to three sessions a week. This is enough to stretch your body and put you on the right lane to your fitness goals. Most importantly, take time to listen and respond to your body.
How long should a yoga session be?
Where most workplaces and studios offer yoga lessons for 30 to 45 minutes, an ideal beginner and intermediate yoga class should last around 60 minutes (1 hour). For more advanced workshops and students, this could go longer for 90 minutes.
Can you lose weight doing yoga?
Yoga is excellent for managing your stress levels, improving your moods, creating a community of support and curbing stress eating. All these are important and can help you lose weight. In addition, yoga has also been proven to increase muscle mass and burn calories.
Can yoga tone arms?
Yoga is a proven exercise to sculpt and tone your muscles and build the upper body strength. You should start seeing significant improvements in your arm tone after 4 to 8 weeks of yoga.
Does yoga help flabby arms?
Almost all yoga poses shapes and strengthens tour back, shoulders and arms. The result is a sculpted, strong and lean look.
Can yoga change your body shape?
Regular yoga exercises will help sculpt your body and give you a toned look. Yoga helps burn calories and build muscle strength. This helps to re-align and lengthen your muscle fibres.
Conclusion
Yoga has so many health benefits. There is so many types of postures and depending on your goal and capacity, you can choose the pose that is good for you. What is important is to ensure that you give your body enough rest in-between poses and after the whole session.
More importantly, those who aspire to get the yoga habit must take time to learn more about it so that they can make an informed decision on how to do it “home or classes’’ and on which poses they are aspiring to learn about looking and the benefits such poses bring for them.